Migrating a website can be a daunting task, especially when you’re dealing with a complex content management system like WordPress. However, with the right tools and techniques, the process can be streamlined and hassle-free.
In this guide, we will walk you through the steps of migrating your site using the All-in-One WP Migration plugin. Whether you’re moving to a new hosting provider or simply looking to create a development environment, this comprehensive tutorial will help you accomplish your goals smoothly.
Learn how to migrate your site using All-in-One WP Migration in this step-by-step guide. Discover the best practices and expert tips to make the process seamless and error-free.
How to Migrate Site Using All-in-One WP Migration
All Heading
Migrating your site using the All-in-One WP Migration plugin is easier than you might think. By following these steps, you’ll be able to move your website with minimal downtime and ensure a smooth transition for your visitors.
Step 1: Install and Activate the All-in-One WP Migration Plugin
The first step in the migration process is to install and activate the All-in-One WP Migration plugin on your WordPress site. You can do this by following these simple steps:
- Log in to your WordPress dashboard.
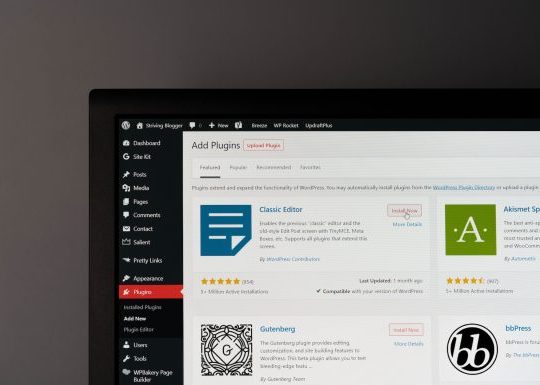
- Navigate to the “Plugins” section and click on “Add New.”
- In the search bar, type “All-in-One WP Migration.”
- Locate the plugin and click on “Install Now.”
- Once the installation is complete, click on “Activate” to activate the plugin.
Step 2: Exporting Your WordPress Site
Once you have the All-in-One WP Migration plugin activated, you can proceed with exporting your WordPress site. This process creates a backup file of your entire website, including all of its files, databases, themes, plugins, and settings. To export your site, follow these steps:
- Go to the All-in-One WP Migration tab in your WordPress dashboard.
- Select the “Export” option from the drop-down menu.
- Choose the “File” option to export your site as a downloadable file.
- The plugin will then generate the backup file, and you can download it to your computer.
Step 3: Setting Up Your New WordPress Installation
Before you can import your site into a new WordPress installation, you need to set up the environment where you want to migrate your website. This can be a different hosting provider, a local development environment, or even a subdomain. Follow these steps to get your new WordPress installation ready:
- Install WordPress on your new environment or hosting provider.
- Log in to your new WordPress dashboard.
- Install and activate the All-in-One WP Migration plugin on the new site (refer to Step 1).
- Navigate to the All-in-One WP Migration tab and choose the “Import” option.
- Select the “File” option and upload the backup file you downloaded in Step 2.
Step 4: Importing Your Site
Now that you have your new WordPress installation set up, it’s time to import your site using the All-in-One WP Migration plugin. This step will transfer all of your website data, including themes, plugins, media files, and settings, to the new environment. Follow these steps to import your site:
- Go to the All-in-One WP Migration tab in your new WordPress dashboard.
- Click on the “Import” option from the drop-down menu.
- Choose the “File” option and upload the backup file.
- The plugin will automatically start importing your site.
- Once the import is complete, you will receive a notification.
Step 5: Verifying and Updating Links
After importing your site, it’s essential to verify and update any internal or external links that may have changed during the migration process. Broken or outdated links can negatively impact your website’s user experience and SEO. Follow these steps to ensure all links are working correctly:
- Use a link checker tool to scan your website for broken links.
- Update any internal links that may have changed due to the migration.
- Check external links and update them if necessary.
- Conduct a thorough review of your website’s pages to verify that all links are functioning properly.
Step 6: Configuring Permalinks and Settings
During the migration process, it’s crucial to review and configure your website’s permalinks and settings to ensure they match your previous setup. Here’s what you need to do:
- Go to the “Settings” tab in your new WordPress dashboard.
- Select the “Permalinks” option.
- Choose the same permalink structure that you had on your previous site.
- Review and adjust other settings, such as reading, discussion, and media settings, as needed.
Step 7: Testing Your Site
Before making your migrated site live, it’s essential to thoroughly test its functionality and appearance. Follow these steps to ensure everything is working correctly:
- Visit various pages on your site to check for any errors or missing content.
- Test forms, buttons, and interactive elements to ensure they are functioning properly.
- Verify that your website’s design and layout are consistent across different devices and browsers.
- Conduct a comprehensive review of your site’s performance and loading speed.
- Test any additional functionality or plugins you have installed on your site.
Step 8: Updating DNS and Going Live
Once you have tested your migrated site and are confident that everything is working correctly, it’s time to update your domain’s DNS settings to point to your new hosting provider. Follow these steps to make your site live:
- Contact your new hosting provider for the necessary DNS information.
- Log in to your domain registrar’s account and locate the DNS settings.
- Update the nameservers or A record to point to your new hosting provider.
- Allow some time for the DNS changes to propagate (usually a few hours or up to 48 hours).
- After the DNS propagation is complete, your site will be live on the new hosting provider.
Conclusion
Migrating your site using the All-in-One WP Migration plugin offers a convenient and reliable way to transfer your WordPress website to a new environment or hosting provider. By following the step-by-step guide outlined in this article, you can ensure a smooth and successful migration process.
Remember to install and activate the All-in-One WP Migration plugin, export your site, set up your new WordPress installation, import the backup file, verify and update links, configure settings, test your site, update DNS, and finally, make your site live. Throughout the process, keep in mind the FAQs and answers provided to address any potential concerns.
Migrating your site may seem like a daunting task, but with the right tools and guidance, it can be a straightforward and manageable process. So go ahead, confidently migrate your site using All-in-One WP Migration, and enjoy the benefits of your new environment.


Recent Comments