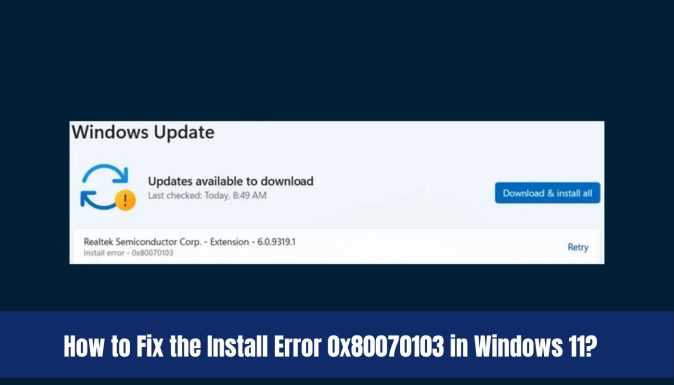
Hello, Windows 11 users! Ever encountered the annoying “Install Error 0x80070103” while updating? No worries, as this guide is here to rescue you with easy-to-follow solutions. Let’s tackle this error together and ensure your Windows 11 is up-to-date.
Why did the Install Error 0x80070103 in Windows 11 Happen?
All Heading
Before diving into solutions, let’s grasp why this error occurs. The 0x80070103 error often pops up when Windows 11 attempts to install a driver that’s already on your system or faces compatibility issues during the update. Other suspects include corrupted system files, active drivers during the update, damaged update cache data, or a disabled Windows Update service.
How to Fix Install Error 0x80070103 in Windows 11
Follow below steps one by one to fix Error 0x80070103 in Windows 11:
Fix 1: Pause and Resume Windows Updates
Give your updates a little pause and resume dance. Click “Retry” on the update that hit the error, pause the update briefly, then resume. Simple, yet sometimes effective.
Fix 2: Manually Install the Update
Take matters into your own hands. If an update fails, manually download it from the Microsoft Update Catalog and install it. Here’s how:
- Open Settings with Windows + I.
- Go to Windows Update and check for failed install numbers in Update history.
- Copy the failed update number, visit Microsoft Update Catalog, and download it.
- Double-click to run the installer and complete the update.
Fix 3: Run Windows Update Troubleshooter
Let Windows lend a helping hand. The Windows Update Troubleshooter can detect and fix errors related to updates. Here’s how:
- Open Settings (Windows + I) and select “System” then click on “Troubleshoot.”
- Run the Windows Update troubleshooter and apply any identified fixes.
Fix 4: Restart the Windows Update Service
Give the Windows Update service a restart hug. Sometimes, a simple restart can work wonders.
- Press Windows + R, type services.msc, and hit Enter.
- Right-click Windows Update, select Stop, then right-click again and choose Restart.
Fix 5: Install the Optional Update
Don’t neglect the optional updates. Windows might generate updates for drivers separately, directly addressing the 0x80070103 driver-related issue.
- In Settings, go to Windows Update, then Advanced options.
- Under Additional updates, click Optional updates.
- Choose and install the optional updates.
Fix 6: Run SFC and DISM
Scan and repair those system files. Running SFC (System File Checker) or DISM (Deployment Image Servicing and Management) can fix potential system file issues.
- Open Command Prompt as administrator.
- Run sfc /scannow. If needed, follow up with the DISM commands:
Dism /Online /Cleanup-Image /CheckHealth
Dism /Online /Cleanup-Image /ScanHealth
Dism /Online /Cleanup-Image /RestoreHealth - Afterwards, reboot your PC.
Fix 7: Delete the SoftwareDistribution Folder
Clear out the update clutter. Deleting the SoftwareDistribution folder can sometimes resolve update-related problems.
- Open Command Prompt as administrator.
- Run commands to stop related services and delete files in SoftwareDistribution.
- Restart the services and check for the error.
Fix 8: Use Windows 11 Media Creation Tool
When all else fails, consider a fresh start. Use the Windows 11 Media Creation Tool to reinstall Windows 11.
- Download the tool from Microsoft’s official website.
- Choose either “Upgrade This PC Now” or “Create Installation Media” and follow the on-screen instructions.
Conclusion
With these fixes, bid farewell to the troublesome Install Error 0x80070103 in Windows 11. Give these solutions a whirl, and may your Windows 11 updates be smooth sailing from now on. If issues persist, drop a comment below for further assistance. Happy updating!


amoxicillin 500 mg cost: amoxicillin 500 mg tablets – amoxicillin 250 mg capsule