They may seem to be insignificant, but immovable objects on your websites can have a great impact when it comes to user experience, SEO, and other aspects that drive traffic up. Nobody likes to scroll down a website when crucial elements and sidebars become unreachable. On the contrary, visitors like it when everything they want is there now and ready to click on.
Maybe you have heard of it, maybe not, but to solve this problem group of intelligent WordPress developers has created a WP Sticky plugin that is considered the solution to all-out disappearing objects problems, and in this article, we are going to cover it, review its features and come to conclusion is it really solution to this very specific problem.
Introduction
All Heading
WP Sticky is a powerful plugin with a single purpose for WordPress developers: to make elements on the page persistent. Nevertheless, if you are just launched yourself into the wavy waters of WordPress, or if you are already established and natural within these surroundings, you don’t have to worry; this plugin is super-easy to use, navigate through, and play with. It is compatible with any WordPress theme, builder, and other plugins.
Speaking of the most eminent features this one comes with, there are many of them. First of all, the feature that makes it so precious is that it can make any element stick. How so, we will cover it a bit later. The next one is to pick visually what allows you to just pick as many elements you want without writing a single line of code! In addition to these, there are numerous customizing options that we will cover next.
Installation
After you purchase this gem of a plugin, you will get two emails; the first one contains the receipt, and the second one contains your unique license key and download link for downloading the plugin itself. (For price ranges check the bottom of this article.)
After you download your zip file, you shall now upload it to your WordPress plugin admin dashboard where, after uploading, you will activate the plugin and in its settings ask for the license key you received in the second email.
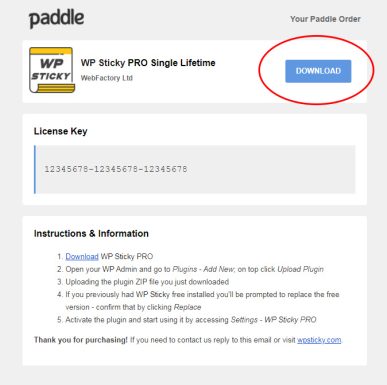
Congratulations, now you are a proud owner of the WP Sticky sample. Now let’s dig for some concrete information about how the plugin works, and see its features, and pricing.
How can you make an object sticky?
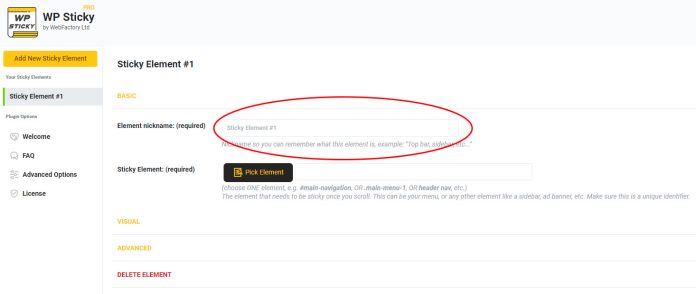
First, we need to cover some basic steps. After you activate the plugin and you find it in your plugin library, go to its settings after which the screen showed down below will appear. Let’s start with the first required information. Before the actual choosing object you want to implement the plugin on, you need to name it (in the text box rounded red on the photo). After you give it a name you press the black button below it – Pick element. The plugin will automatically forward you to your webpage where you just have to choose an object, for instance, a header, with a simple click!
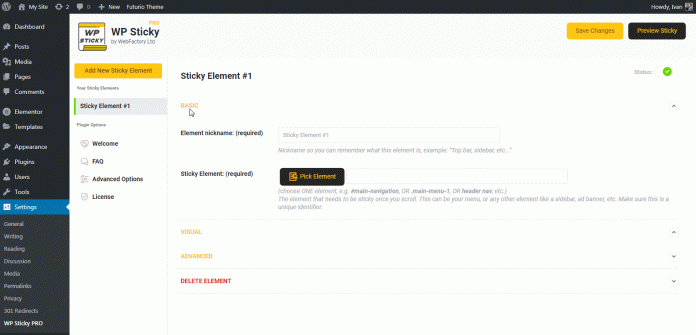
And you’re done! It’s that easy! Now, what comes next is totally up to you. In the visual panel, as shown in the photo below, you can change the slide-down effects, choices are Fade-in and Slide down effects. Besides that, you can mark what devices should the plugin cover (small, medium, large, and extra-large), and you can change the opacity, and scroll range, as well.
Visual Picker
The feature we mentioned above is the feature where you can skip tiring coding sessions just to pick an object. WP Sticky sophistication enables us to visually pick any object on the page we want! As you move your cursor up and down your page, you will see the circular and rectangular highlights around the objects. This is the way the plugin tells us which objects we can apply WP Sticky on.
Picking how the object will look like
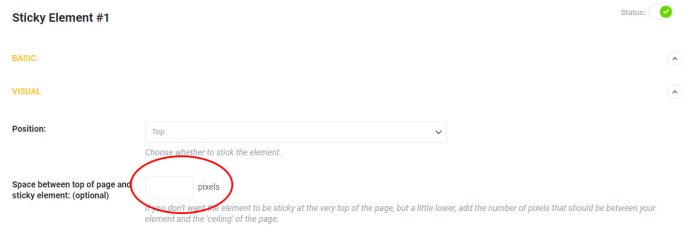
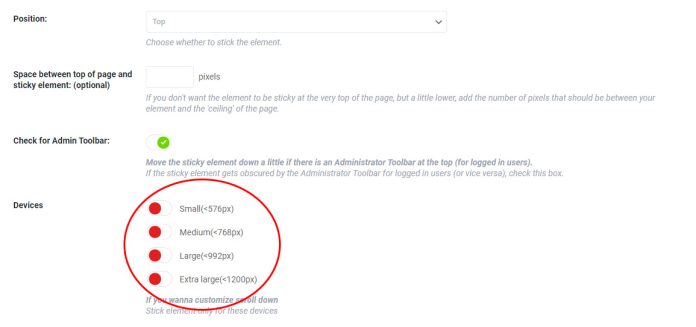
After you did all the technicalities, it is now time for some visual polishing. In the visual tab at your disposal are position settings where you tell the plugin where to place the object – on top or the bottom of the page.
The next one is the determination of spacing between the object and the top of the page. It is an optional feature but if you choose to implement it, you should know that entering the numbers of pixels means how many pixels the sticky element will be distant from the top. This comes useful when we have the object is appearing too close to the top of the page.
Devices
In the screen shown above, it can be seen how you can choose which device dimension should the plugin apply the configuration. You can choose between four options – small (less than 576 pixels, medium, less than 768 pixels, large, devices with screens smaller than 992 pixels, and extra-large devices with screens less than 1200 pixels, respectively).
Background color option
This option is useful when the object you treated becomes less visible when scrolling down the page. Clicking on the Select color button you can choose the specific color from the palette.
Pricing
All these nice and useful features are certainly not free. But comparing what you get with the purchase, it is worth it! WP Sticky comes in three different plans: Single, Team, and Agency. Single is the basic one and it costs $39. The Team plan is $49, and the one that comes with all the possibilities is the Agency plan for just $99. The payments are one-time!

Last hurrah
In this article, we have covered a true one-of-a-kind, gemstone of plugins! Suddenly, for the sake of enabling the users the highest possible experience during their time on your site, you will have to turn to solutions. The best one for that kind is the one we wrote about above. On all these features, we should mention its pro 24/7 support that will hop in when the documentation they provided can’t help.







Recent Comments