Mastering color grading is essential for any filmmaker or video editor aiming to create professional, cinematic visuals. DaVinci Resolve stands out as the industry standard for color correction and grading, providing powerful tools used in Hollywood films, documentaries, and high-end productions around the world. Whether you’re an indie filmmaker, a content creator, or a media professional, learning to leverage DaVinci Resolve’s capabilities can elevate your visual storytelling to a new level.
TL;DR
All Heading
DaVinci Resolve is one of the most comprehensive tools for professional-level color grading. This article guides you through key concepts, tools, and workflows that you need to understand to create polished and cinematic looks in your videos. From node structure and color wheels to LUTs and HDR grading, you’ll learn how to take full control of your image. Ideal for both beginners and intermediate users aiming to take their post-production skills to the next level.
Why Color Grading Matters
Color grading is more than just making footage look “nice”—it is a form of visual storytelling. A proper grade can:
- Set the mood and tone of your scenes.
- Enhance visual continuity across shots.
- Support narrative themes.
- Create consistency among different camera types and lighting conditions.
Without proper grading, even the best footage can look flat and amateurish. That’s where DaVinci Resolve excels—providing granular control over every aspect of color, tone, and contrast.
Understanding the Basics of DaVinci Resolve
Before diving into advanced grading techniques, it’s crucial to understand how DaVinci Resolve is structured. The software is divided into several pages, each designed for specific tasks:
- Media Page: For importing and organizing your footage.
- Edit Page: A full-featured non-linear editing environment.
- Color Page: The heart of the grading process with powerful tools and node workflows.
- Deliver Page: Export settings for final output.
For this article, we focus on the Color Page, where most of the grading magic happens.
Node-Based Workflow: The Key to Precision
One of DaVinci Resolve’s most powerful features is its node-based architecture. Unlike linear layers in traditional editors, nodes allow you to build complex grading pipelines where each node represents a distinct correction or adjustment.
Common types of nodes include:
- Corrector Node: Perform color adjustments such as contrast, highlights, and saturation.
- Serial and Parallel Nodes: Separate different adjustments into organized flows, avoiding destructive edits.
- Layer Mixer Nodes: Combine multiple effects or grades in a single output.
Using nodes effectively gives you immense control and flexibility when creating professional visual grades.

Essential Tools for Professional Looks
Within the Color Page, DaVinci Resolve offers many tools tailored for precise control. Here are some of the essentials:
1. Color Wheels
The Lift, Gamma, Gain wheels allow you to manipulate the shadows, midtones, and highlights respectively. Understanding how to balance these is fundamental to achieving filmic contrast and tonality.
2. Curves
Curves provide high precision in adjusting luminance and color. You can target specific tone regions or individual RGB channels for cinematic effects and color sculpting.
3. Qualifiers
Qualifiers enable you to isolate and grade specific colors or objects within a shot. This allows for localized corrections like adjusting a sky’s hue or skin tone without affecting the entire frame.
4. Power Windows
Draw and track shapes to apply grades to specific areas. Commonly used in vignetting, spotlighting characters, or correcting lighting imbalances in part of a frame.
5. Scopes
Professional work relies on scopes like the waveform, parade, vectorscope, and histogram. These provide objective, visual feedback about the luminance and chrominance levels in your footage.
Creating Cinematic Looks
A “cinematic” look is more than just one-click presets or LUTs. It involves subtleties like controlled contrast, authentic color science, and maintaining color harmony throughout a sequence. Here’s how to approach it methodically:
Step 1: Normalize Your Footage
Camera footage, especially shot in LOG profiles, must be normalized either using camera-specific LUTs or a manual contrast and saturation correction. This gives you a neutral base for creative grading.
Step 2: Balance the Exposure and White Point
Ensure that your overall exposure and white balance are consistent across all shots. Use scopes to compare shots and match them precisely.
Step 3: Creative Grade
After technical corrections, begin your creative grading. This involves applying your desired look—cool and moody, warm and romantic, or dark and gritty—depending on the narrative.
Step 4: Apply Film Grain, LUTs, and Final Adjustments
Use film emulation LUTs sparingly and add film grain to replicate the aesthetic of analog film. Make your final tweaks while rechecking scopes for compliance with delivery standards.

Working with LUTs
LUTs (Look-Up Tables) are pre-defined color transformations. They can drastically alter the mood of an image but should be used thoughtfully.
- Technical LUTs: For converting LOG profiles into Rec.709 or standardized color spaces.
- Creative LUTs: For applying stylized looks, often used as starting points for custom grading.
In DaVinci Resolve, you can chain LUTs as nodes, allowing additional custom grading before or after their application. Always monitor your results using scopes and never rely solely on LUTs for quality output.
Grading in HDR and Dolby Vision
With the increasing demand for HDR content, DaVinci Resolve provides comprehensive support for HDR10, Dolby Vision, and HLG workflows. Grading in HDR requires greater attention to highlight control and extended dynamic range.
To begin with HDR grading, you should:
- Work on a calibrated HDR monitor.
- Enable HDR color management in Project Settings.
- Use the Zone and HDR wheels for precise tonal control beyond SDR limits.
This is a field where precision and technical knowledge are paramount, but DaVinci Resolve’s toolset is ready for it.
Best Practices and Tips
- Use version control: DaVinci’s timeline versions and stills can store multiple grades for comparison.
- Create look presets: Save commonly used node trees or looks as PowerGrades.
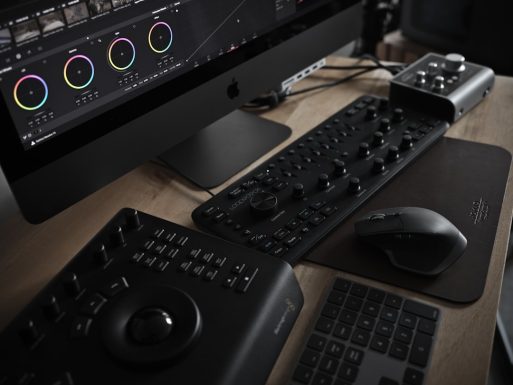
- Invest in a control surface: For larger projects, using a dedicated panel like the DaVinci Resolve Micro Panel improves speed and accuracy.
- Consistency is key: Use reference stills and timeline matching to ensure a cohesive color treatment across scenes.
Conclusion
Mastering DaVinci Resolve for professional color grading is both an art and a science. With the right techniques and an understanding of its powerful workflow, you can transform ordinary footage into visually compelling narratives. From basic color correction to HDR and stylized looks, DaVinci Resolve offers everything needed to bring your creative vision to life.
Invest time learning the tools, practice with real-world footage, and stay updated with color science trends. Soon, you’ll find yourself producing visuals that stand shoulder to shoulder with professional film and television content.


Recent Comments